Lighting is often the final puzzle piece to achieve the perfect look when upgrading a room or styling a new outdoor entertaining area. The fun of rope lighting is you can hang it almost anywhere and along most surfaces without specialized tools and complicated electrical work.
However, hanging rope lighting to achieve a stylish finish can be a daunting task, especially for those of us who haven’t had a chance to fine-tune our DIY skills. So, we are going to tell you how to hang rope lights with simple steps.
Latest Looks of Rope Lights
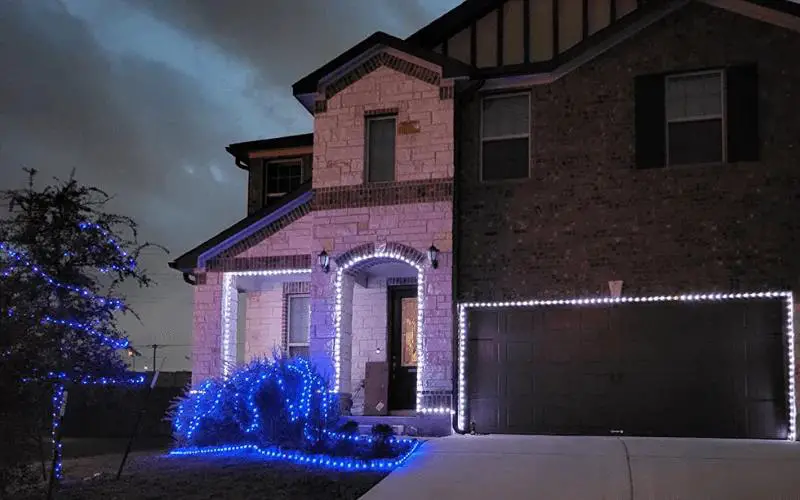
Rope lights can be used outdoors and indoors, and due to their flexibility, using rope lighting to frame or line areas is a popular trend.
Outdoors, rope lights can provide ambient soft lighting to a seating area if it frames fencing or the roof of a pergola or canopy. Rope lights can be wound around trees or carefully positioned in foliage for an ethereal, romantic feel. Rope lights alone can be used to create a canopy effect that makes the garden an inviting area ready for entertaining or enjoying late summer nights. Most rope lights are battery-powered (there are even solar-powered options available!), giving you total flexibility with your placement of the lighting without having to consider the power source.
Indoors, rope lights are great for adding soft extra light and interesting style features. Framing or lining walls, mirrors, and pictures is a great way to utilize rope lighting inside. Rope lighting as a wall feature in its own right is a brilliant and temporary way to add something extra to a room. Choose colors, light intensity, and thickness of rope that suits your room and styling. With rope lights being a temporary way to add a lighting feature, you don’t need any heavy-duty DIY. The only limit is your creativity!

Hanging Rope Lights – Where to Start?
Before you learn how to hang rope lights, you need to prepare some tools. There is a variety of fixings available for rope lights. Cable clips that are the correct diameter for the rope lighting are the best way to ensure a secure and long-lasting fixing. You can achieve a variety of styles using the cable clips, and there are versions that can be screwed or nailed into place, and adhesive non-nail (stick-on) versions available. When choosing the best fixings for you, there are some things you need to consider.
1. Where are the lights going?
Outdoor lights will be subject to temperature changes and different weather. The adhesive on stick-on cable clips will degrade faster outside. To provide a more secure fix against windy conditions, it’s better to use screw clips for outdoor lighting. You will also need lighting and fixings designed for outdoor use.
2. Can you use nails or screws on the surface?
You may have a rental property where adding nails or screws to the wall is prohibited, or you may simply not want to blemish the wall. In this case, adhesive wall clips will provide a great solution that can be removed without leaving any permanent damage.
3. How long do you expect to keep the lighting there?
Although adhesive clips can provide an easy and damage-free way to hang rope lights, the adhesive can degrade over time and need replacing. Intricate rope lighting designs that involve more bending of the plastic tubing may need the added strength of screw clips to hold the design in place.
4. What materials are needed?
A curving design will require a longer length of rope lighting and more clips to hold it in place. A clip will be needed for roughly every 4 inches of rope lighting. Make sure you choose lighting that matches your design ambitions. Lighting with a smaller diameter is likely to be more flexible, whereas a larger diameter rope lighting is likely to be brighter. Clips for rope lighting come in different colors, materials, and diameters, so be sure to choose the ones that suit your design.

How to Hang Rope Lights
Here are the detailed steps you can follow to hang your rope lights.
- Gather everything you need for the job: surface cleaning materials, batteries for the lights, lights, a sufficient number of clips, screws or nails, screwdriver or hammer, pencil for marking, measuring tape, masking tape.
- If required, clean the area where your lights will be placed and clear the area so you can work without tripping hazards or other distractions.
- Mark out your design in pencil and where each clip will be placed – clips should be spaced around 4 to 6 inches apart. But if your design involves more curves, you may need more clips to hold the lights in place and for a polished design.
- Place your clips on the surface or wall using masking tape initially, and check you are happy with the overall placement and design.
- If you are creating a lettering or shaped design with the rope lights, test out a section of your design to check it is achievable with the thickness and flexibility of your rope lights before screwing the clips in.
- Screw or nail each clip into place. Initially, put the screws or nails in halfway. This will make it much easier to remove a clip should you need to move it.
- Turn your lights on for a while to warm up the plastic tubing and increase flexibility.
- Turn off the lights and push them into the clips, taking care to avoid twisting the rope from back to front, as this will create variation in how bright each individual light appears.
- When the lights are secured in each clip, turn on the lights. If you’re happy with the look, fully screw each clip into the permanent position.
We hope you have learned how to hang rope lights. If you have any questions, leave a comment below.

How to Hang Rope Lights Without Nails
If you are using adhesive lighting clips, simply follow the steps above, paying extra attention to cleaning and drying the surface. This will help the adhesive stick well. Be sure to temporarily mark out your design first, even though adhesive clips can be removed; they will lose some of their strength each time they are removed and replaced. So, it’s better to get your design right the first time. The old saying ‘measure twice, cut once’ applies to all areas of DIY; it’s better to take time getting it right through preparation and planning than having to fix mistakes afterward.

